Setting Up Camino Node on Azure
In this guide, we will walk you through the process of setting up Camino Node on the Microsoft Azure platform. You have two methods to choose from for the setup process: the manual method and the automatic method using Terraform.
Whether you're new to blockchain technology or an experienced Azure user, this guide is designed to be accessible and easy to follow. It provides step-by-step instructions to help you get Camino Node up and running smoothly on Azure.
Let's get started with the setup process of Camino Node on Azure. Choose the method that best suits your preferences and needs.
Automatic Method
Before you begin the setup process on Microsoft Azure, ensure you have the template.json and parameters.json files. You can download them using the links below:
The downloaded files have UUIDs appended to their names. After downloading, please rename them
to template.json and parameters.json respectively.
1: Editing the parameters.json File
Before initiating the setup, you'll need to make a few changes to the parameters.json file:
- Modify lines 40 & 55 to input your IP address.
- On line 172, input your public SSH key. If you don't have an SSH key ready, follow the instructions below.
2: Generate an SSH Key
Execute the following commands to create an SSH key:
ssh-keygen -m PEM -t rsa -b 4096 -f $(pwd)//azurekey -N ""
Next, open azurekey.pub and copy its contents. This will be pasted into line 172 of the parameters.json file.
3: Install Azure CLI
Install the Azure Command-Line Interface (CLI) to interact with the Azure resources. Find detailed installation instructions here.
For Ubuntu systems, you can directly install using:
curl -sL https://aka.ms/InstallAzureCLIDeb | sudo bash
4: Azure Login
Before proceeding with the deployment, ensure you're logged in to your Azure account:
az login
Follow the on-screen prompts to complete the login process.
5: Create a Resource Group
Set up a new resource group named camino-node-rg. If you opt for a different location, ensure you also update line number 6 in the parameters.json file.
az group create --name camino-node-rg --location "westeurope"
6: Deploy the Template
With everything in place, you can now deploy the template and initiate your virtual machine:
az deployment group create -f template.json --parameters parameters.json -g camino-node-rg
That's it! Follow these steps, and you'll have Camino Node set up automatically on Microsoft Azure.
Manual Method
1. Navigate to Virtual Machines
- In Azure Services, select Virtual Machines.
- Click Create, followed by Azure Virtual Machine.


2. Set Up Virtual Machine Configuration
- Choose the desired Subscription.
- Optionally, create a new resource group specifically for Camino.
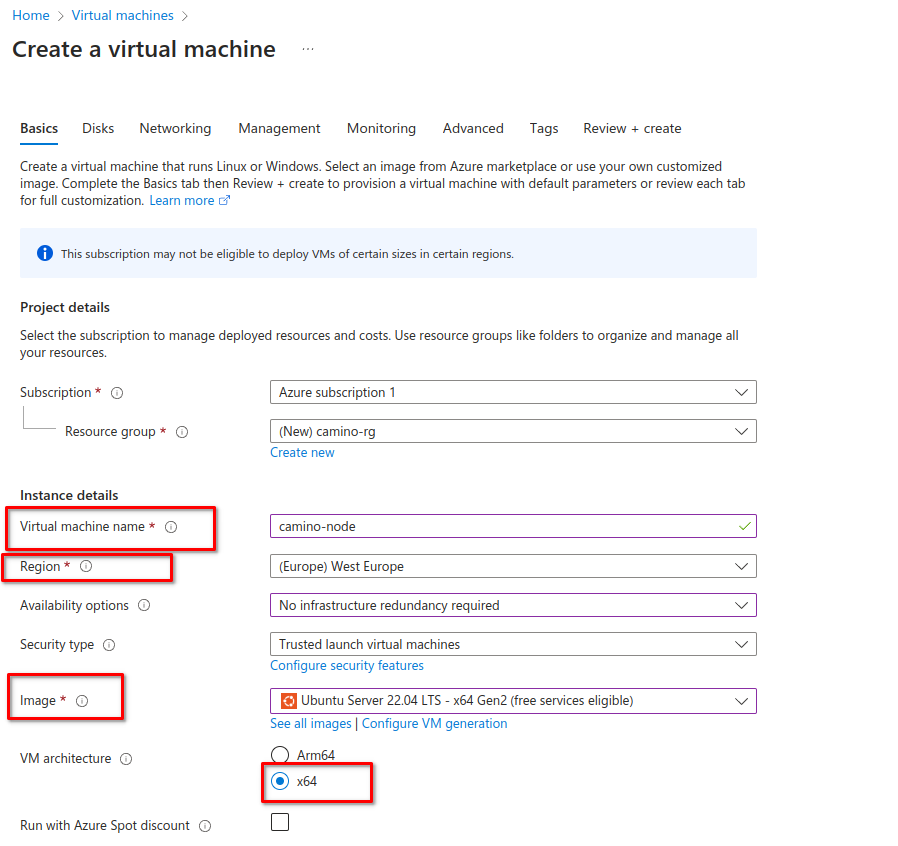
- Input a name for your virtual machine and choose its region.
3. Virtual Machine Image and Size
- For the VM image, choose Ubuntu 22.04 with an x86 architecture.
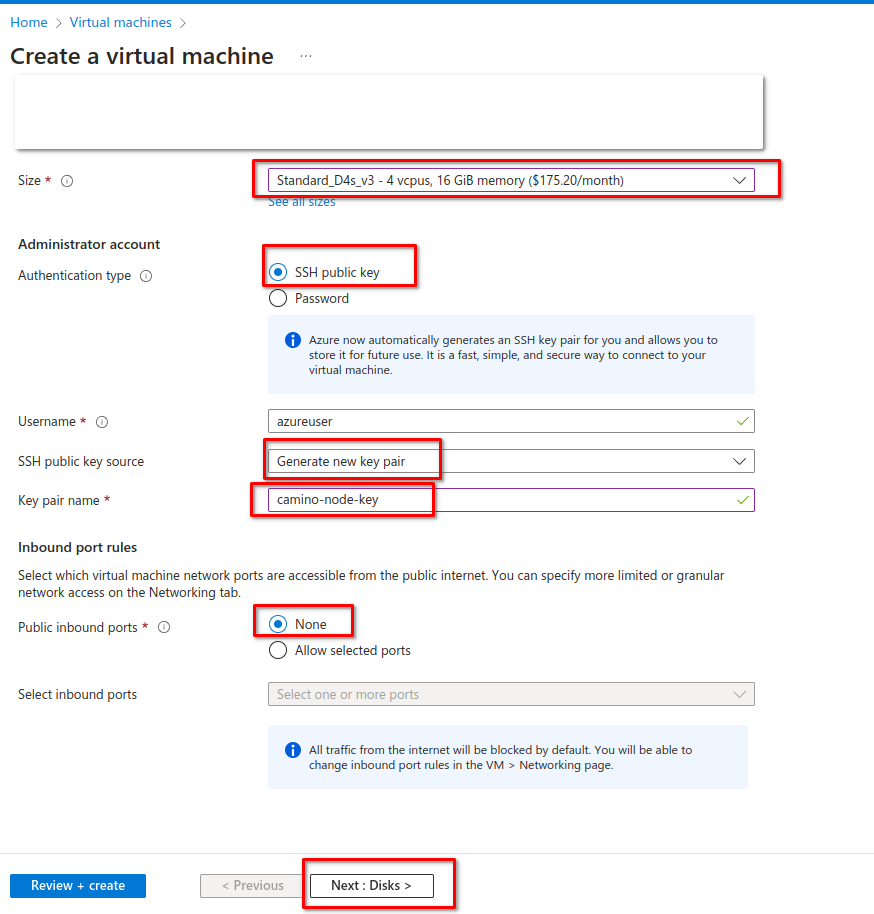
- It's recommended to select a machine size of Standard_D4s_v3. (Fig.4)
4. SSH Key Creation
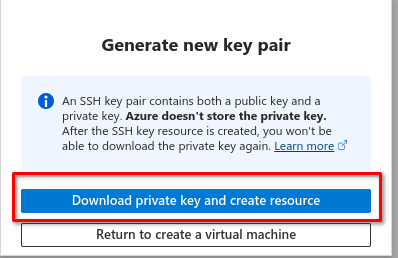
- Generate a new public/private key pair to securely connect to your virtual machine.
5. Configuring Inbound Ports
- Opt for None when selecting Public inbound ports.
6. Disk Configuration
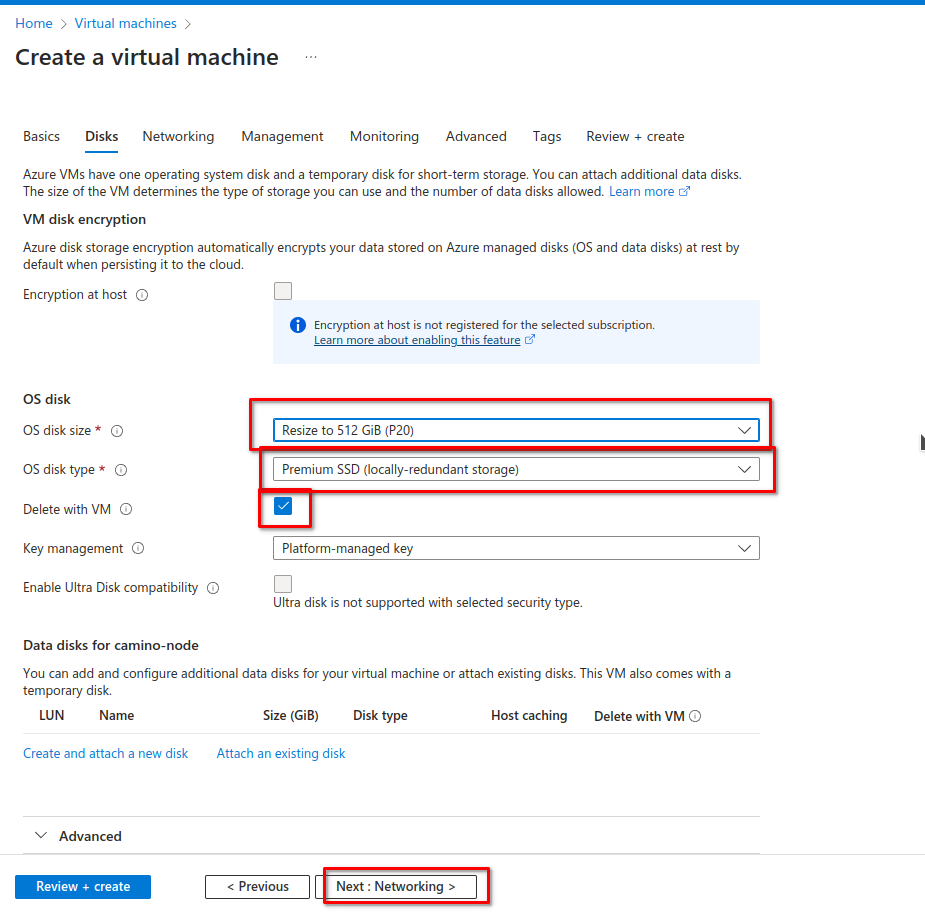
- Proceed to Next: Disks.
- Set the OS disk size to 512 GB.
- Then, navigate to Next: Networking.
7. Network Configuration
- Create a new Virtual Network if needed.
- Choose or assign a new public IP address for the machine.
- Under the NIC network security group, select Advanced and then Create new.
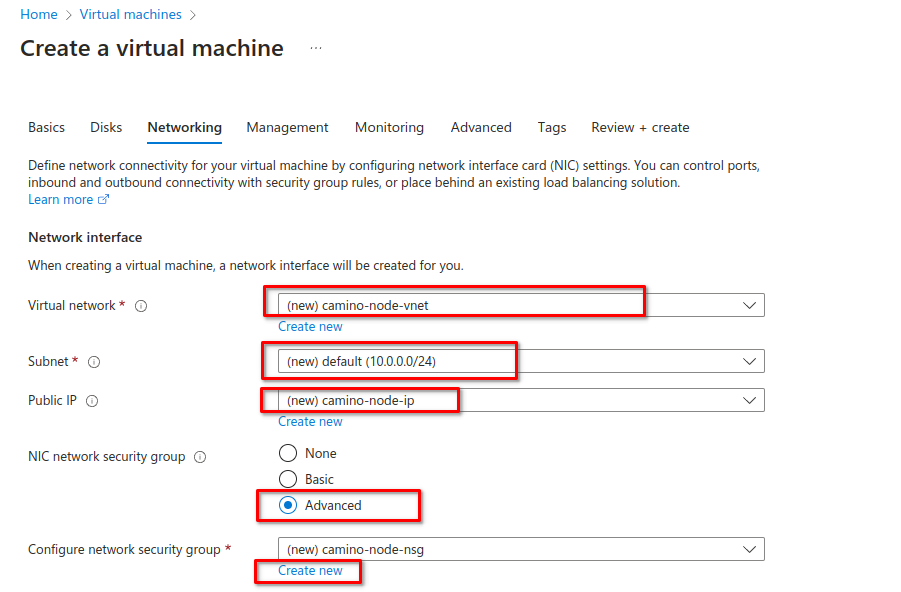
- Delete the default inbound rule.

8. Network Security Rules
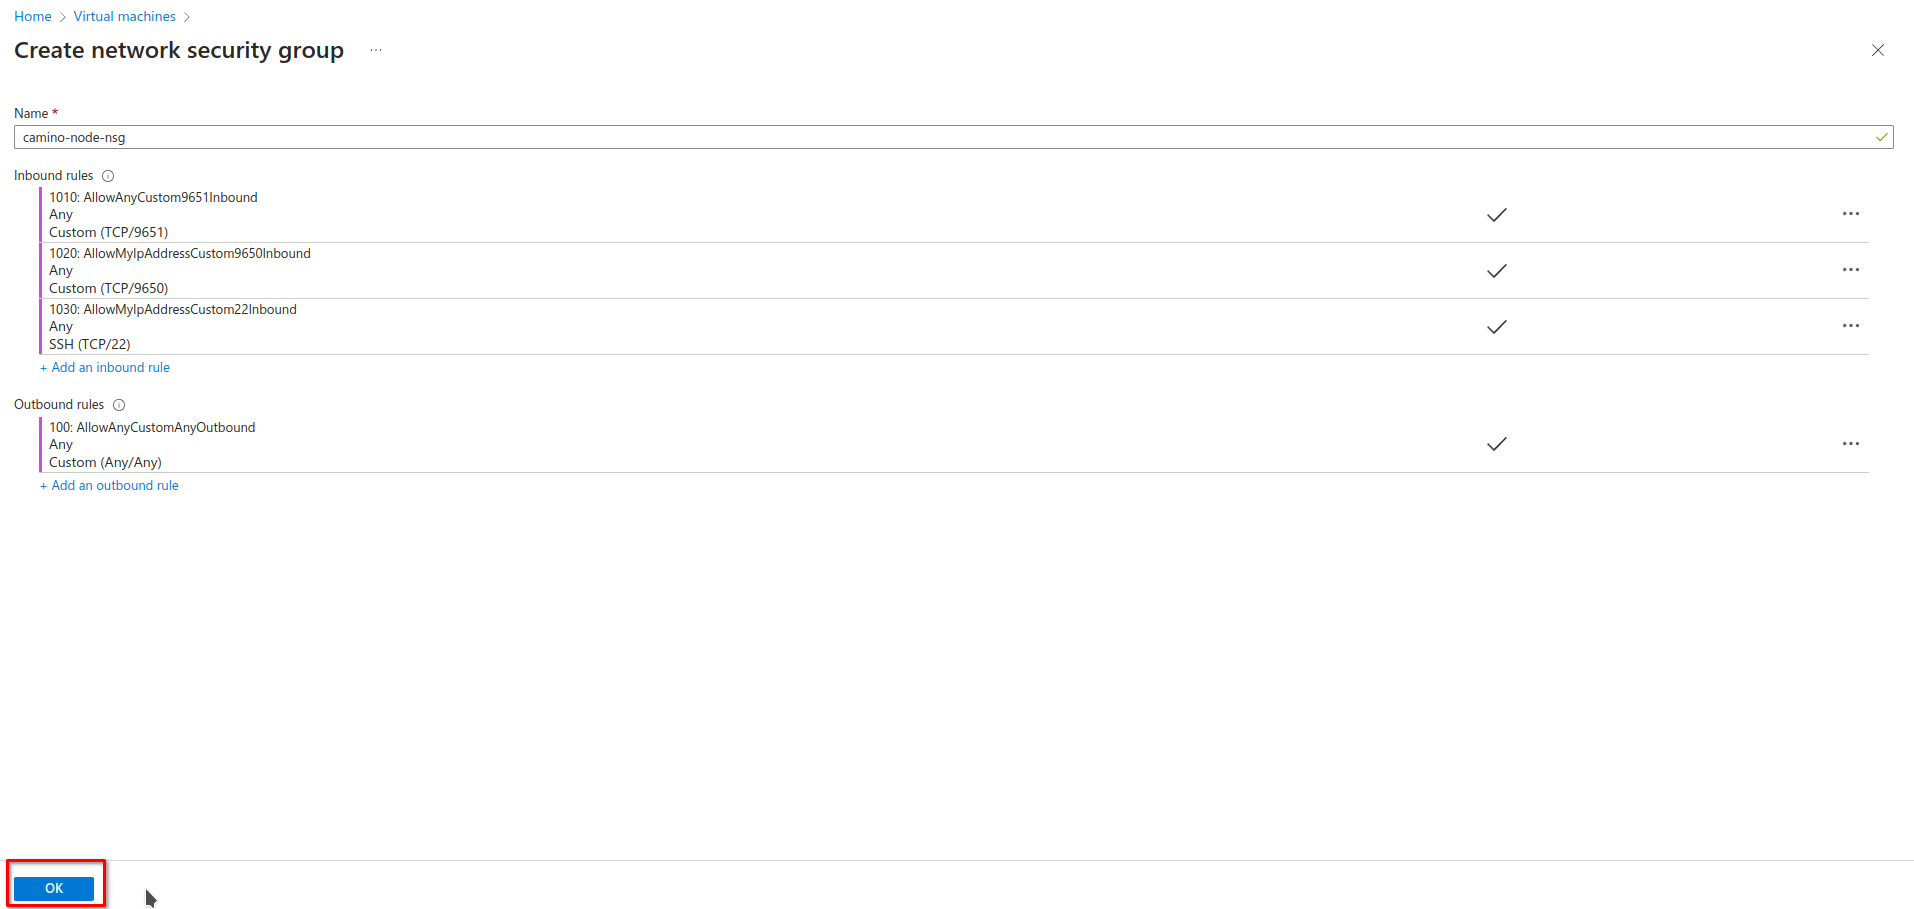
- Add an outbound rule to permit all outbound traffic.

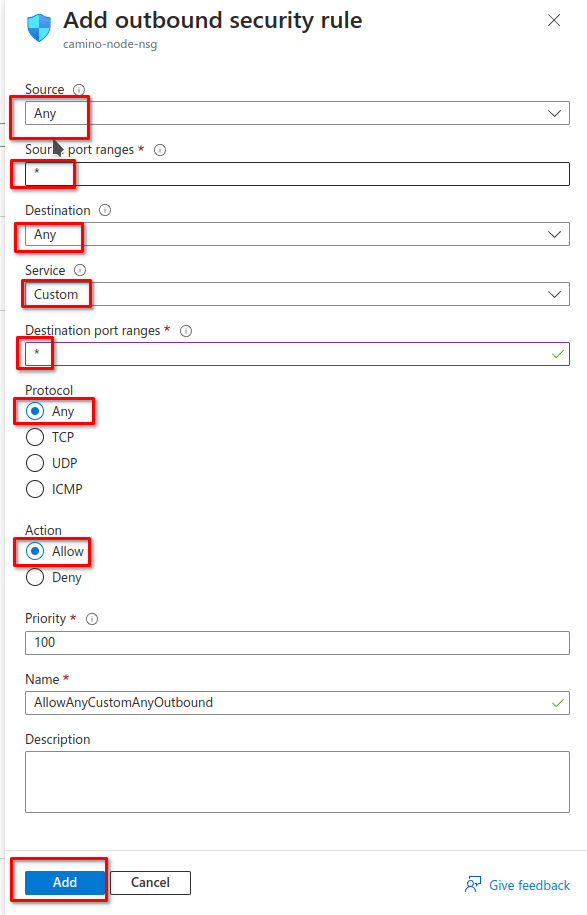
- Configure three inbound rules:
- Open port 9651 for all users.
- Open port 9650 to specific IP ranges, allowing for Camino API calls.
- Open port 22 to specific IP ranges to establish SSH connections.

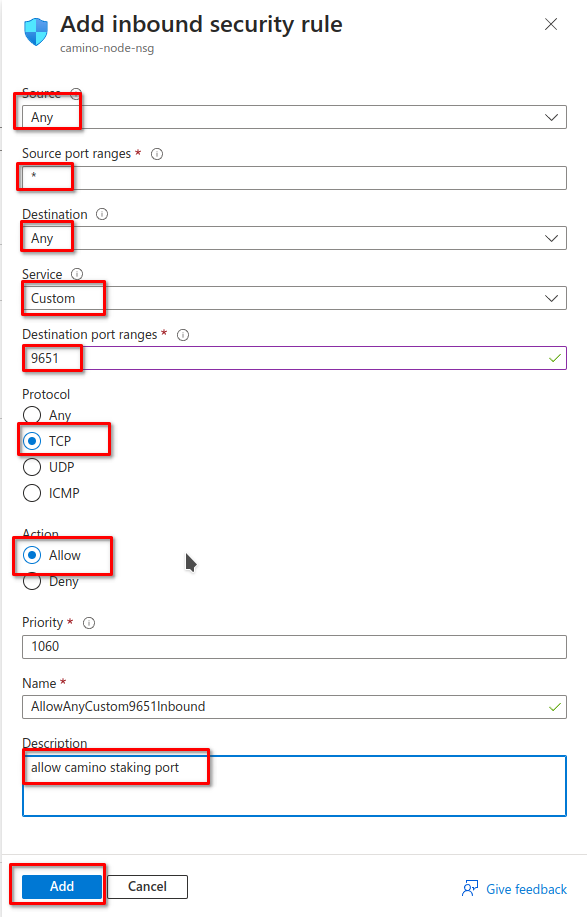
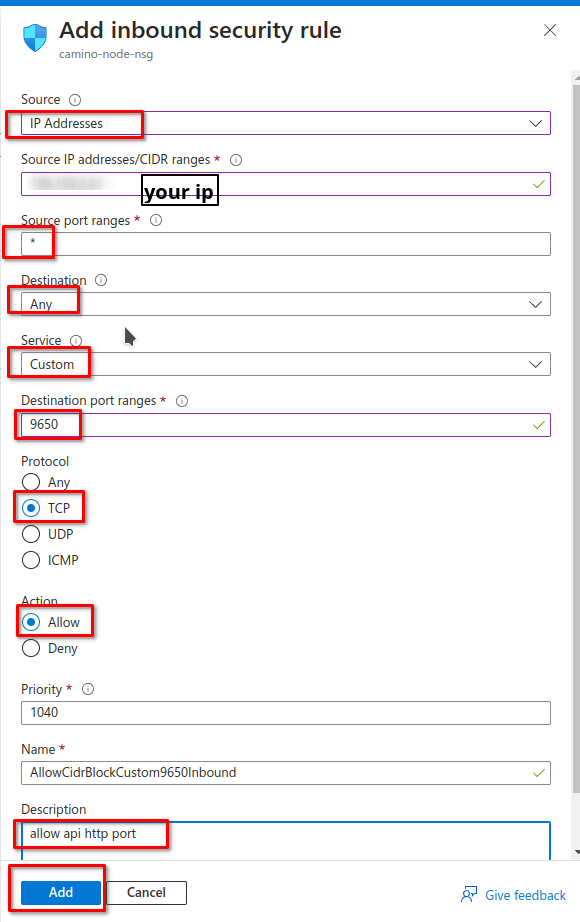
Keep in mind: If you'd like your API node to be universally accessible, you can grant API access to all IP ranges. This will make your node accessible to anyone on the internet.
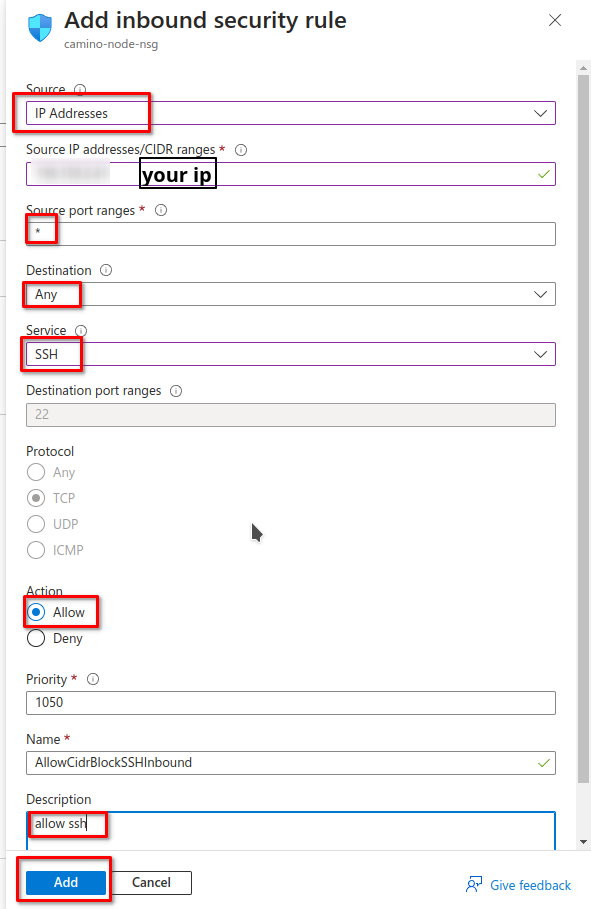
After setting up the security rules, click Ok.
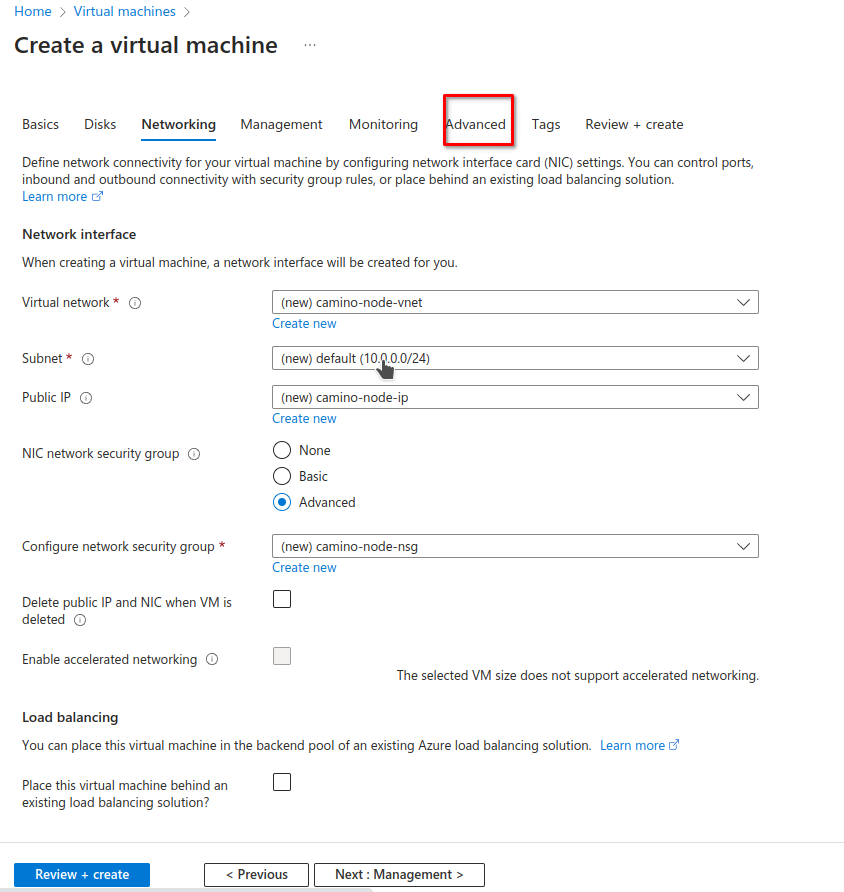
9. Inserting Custom Script
- Navigate to the Advanced tab.
- Under Custom data, input the script below.
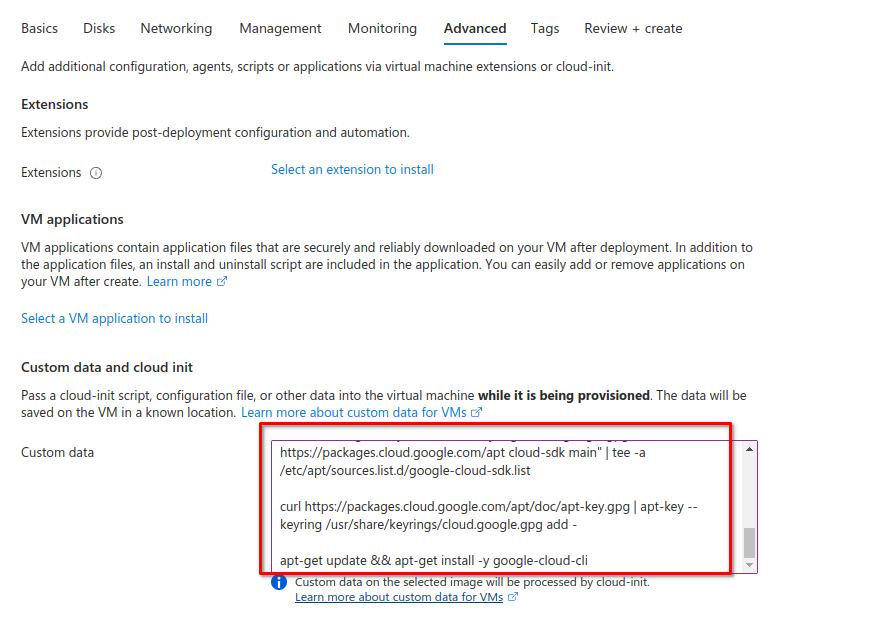
#!/bin/bash

apt-get update
apt-get install -y ca-certificates curl gnupg

install -m 0755 -d /etc/apt/keyrings
curl -fsSL https://download.docker.com/linux/ubuntu/gpg | gpg --dearmor -o /etc/apt/keyrings/docker.gpg
chmod a+r /etc/apt/keyrings/docker.gpg

echo \
  "deb [arch="$(dpkg --print-architecture)" signed-by=/etc/apt/keyrings/docker.gpg] https://download.docker.com/linux/ubuntu \
  "$(. /etc/os-release && echo "$VERSION_CODENAME")" stable" | \
  tee /etc/apt/sources.list.d/docker.list > /dev/null

apt-get update
apt-get install -y docker-ce docker-ce-cli containerd.io docker-buildx-plugin docker-compose-plugin

apt-get install -y apt-transport-https ca-certificates gnupg curl sudo

echo "deb [signed-by=/usr/share/keyrings/cloud.google.gpg] https://packages.cloud.google.com/apt cloud-sdk main" | tee -a /etc/apt/sources.list.d/google-cloud-sdk.list

curl https://packages.cloud.google.com/apt/doc/apt-key.gpg | apt-key --keyring /usr/share/keyrings/cloud.google.gpg add -

apt-get update && apt-get install -y google-cloud-cli

mkdir -p /home/camino-data/db
## for columbus use gs://columbus-db
gsutil -m rsync -d -R  gs://camino-db /home/camino-data/db

docker run -d -v /home/camino-data:/root/.caminogo -p 9650:9650 -p 9651:9651 --restart always c4tplatform/camino-node:latest ./camino-node --network-id=camino --http-host=0.0.0.0 --public-ip-resolution-service=ifconfigme
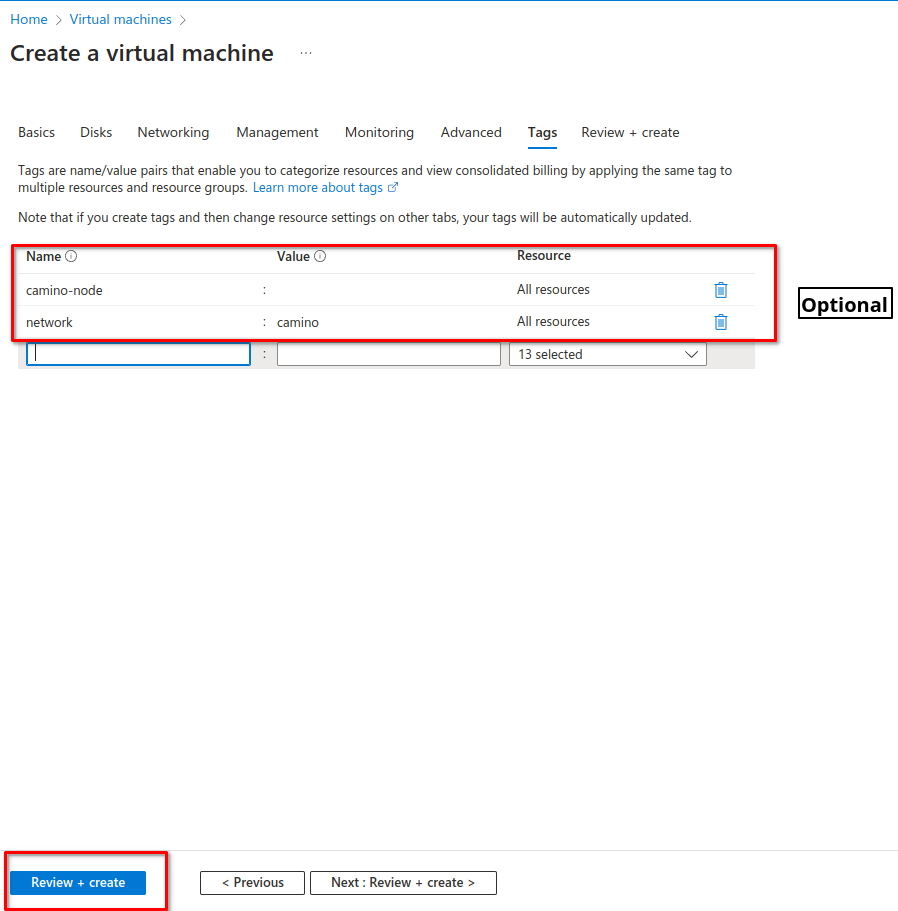
10. Adding Tags
- Switch to the Tags tab.
- Add relevant tags to your virtual machine, such as
camino-nodeornetwork-id: columbus.
11. Finalization
- Click Review and Create.
- Finally, select Create to deploy your VM.
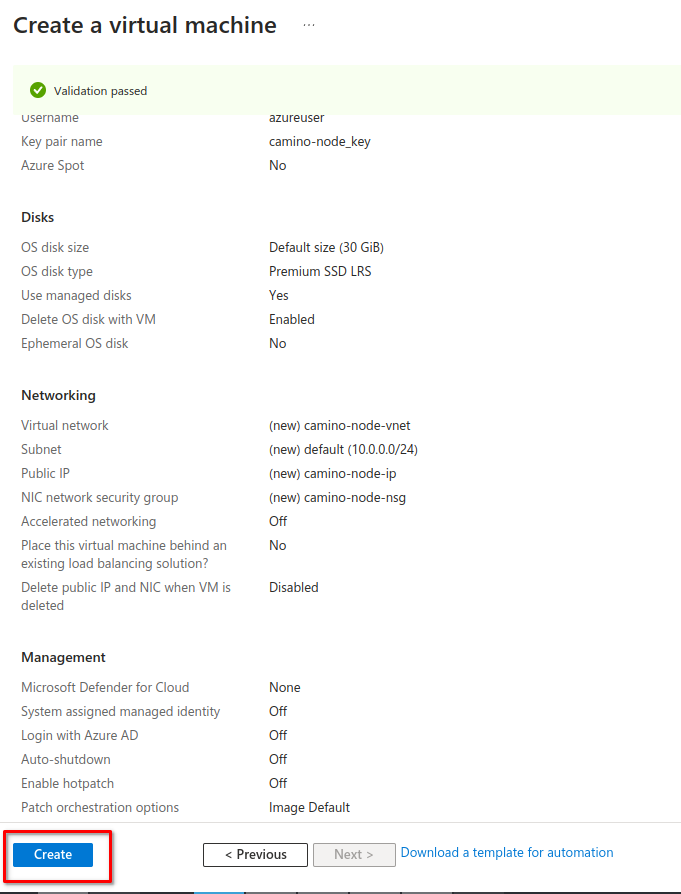
- Don't forget to download the private key file to securely connect to your virtual machine in the future.
